Wondering how to post images or maybe change your avatar or maybe something else?
You can find that and a lot of other useful tips for using the forums in the HydrostreamForums Knowledge Base.

To visit the HydrostreamForums Knowledge Base CLICK HERE

restoring a Ventura II

Restoring your Hydrostream or just giving it a small makeover? What better place than to show off your project. Big or small.
User avatar

YDOC462
HSF Lifetime Supporter
Posts: 901
Joined: Apr 11, 2010 12:57 pm
Location: beaumont, tx
Has thanked: 23 times
Been thanked: 5 times
Contact:

Re: restoring a Ventura II

Post: # 18751Post YDOC462 »

looks great.... the white at night really shows its lines

[ Post made via Android ] Image
81 vector....complete restore....1991 7 pedal 200 slightly modded
ALWAYS under construction

Image
HYDROSTREAM HELLIONS
https://www.youtube.com/watch?v=YHE8wWZsFpw
User avatar

Topic Author
nosboss
Getting my feet wet
Getting my feet wet
Posts: 92
Joined: Jul 15, 2012 3:53 pm
Location: Des Moines, IA
Been thanked: 1 time
Contact:

Re: restoring a Ventura II

Post: # 18754Post nosboss »

I did a lot of sanding on the hull today. I started with 500 grit and wasn't getting very far so i switched to 320. Got the entire top sanded to 320 and moved back to 500 for the well. I decided to buff a small spot on the well to see what it looked like. Shines up ok, but it still needs sanded some more to remove all the low spots. I'm afraid of sanding through all over cause i did get through on an edge. I've done my fair share of sanding and buffing, just not on anything with this rough of a surface. I usually start with 1000 grit for buffing and prep to 320. Anyway, here is a quick pic of the shiny spot.

Image

[ Post made via Android ] Image
'76 ventura II
'87 200 evinrude xp

'79 baja 180ss
User avatar

proprider
Regular
Regular
Posts: 187
Joined: Aug 15, 2012 9:18 pm
Location: Deerfield, Mi
Been thanked: 12 times
Contact:

Re: restoring a Ventura II

Post: # 18755Post proprider »

Looks awesome! Can't wait till mine looks like that.
User avatar

idvette
Hydrostream know it all
Posts: 527
Joined: Aug 08, 2011 10:22 pm
Location: Peterborough Ontario
Has thanked: 11 times
Been thanked: 34 times
Contact:

Re: restoring a Ventura II

Post: # 18756Post idvette »

I see a wool pad on your buffer. They work ok for cutting, but you really want to switch to foam with a 3 stage paste for your buffing and finishing. Try this...


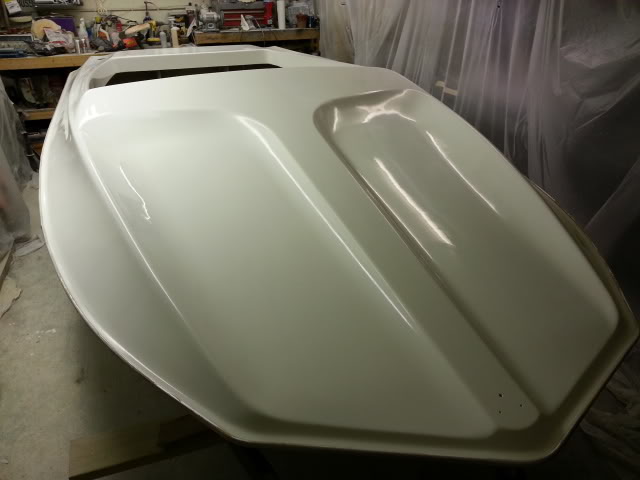
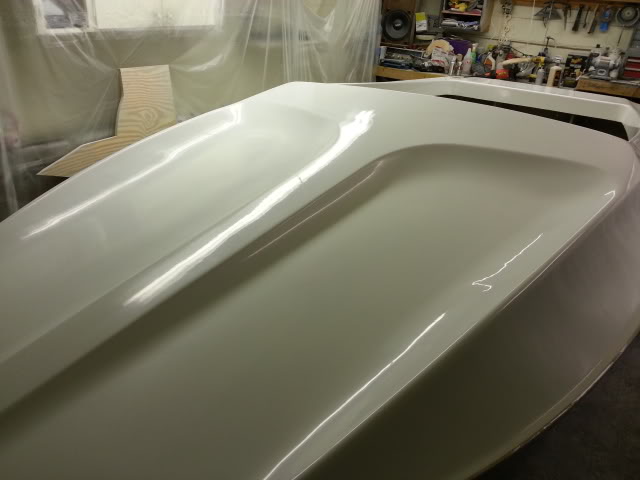
Gelabrasion - Is a Technique that involves the Controlled Abrasion (wearing away) of the oxidation and minor imperfections of the Gel with Abrasive Pastes , Pads and Patience. Procedurally Performing a Cut & Polish (C&P) of your Gel.

This may sound pretty elaborate for what most people know as a Buff & Wax.
Understanding the difference in a B&W and a C&P will help you achieve a lasting shine.
You can spend a lot of time buffing (fast spinning, fast pad movement action) and get poor results and waxing will only dull your Gel quicker.
Buffing and Waxing is for Furniture.
People will ask me what I put on to make my Gel shine, the reply is nothing.
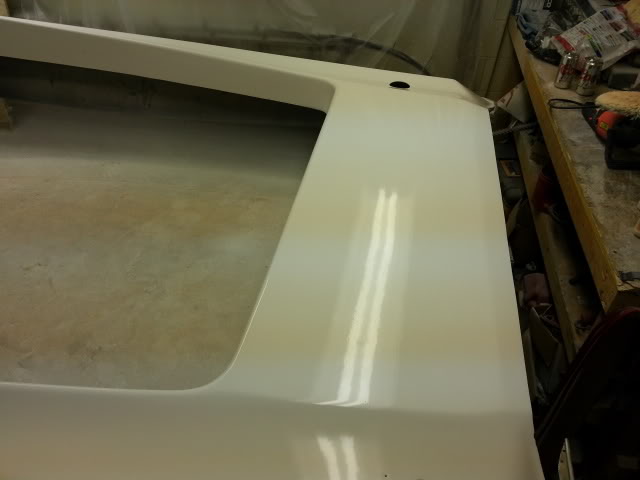
The point were trying to drive home here is that you need to remove (the Cut) Mother Natures abuse and your Gel will shine itself.
Then Polish to fill pores in the Gel and add some weather protection.

The Cut is what it’s all about, the polish is just the clean up.
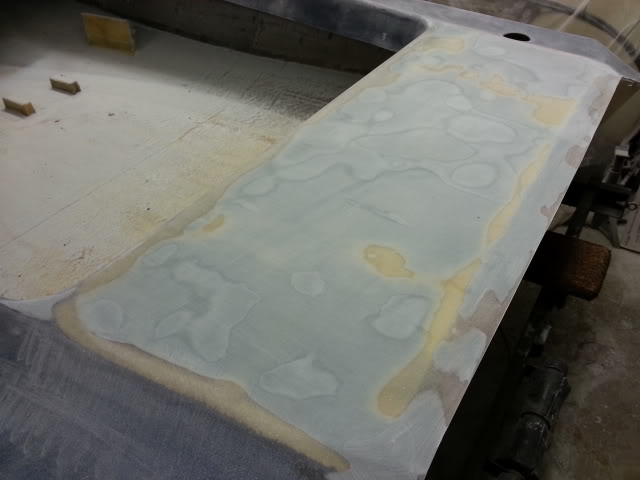
To Cut you need to have a good duration time of the pads wetted surface.
The wetted surface is when you have the paste swirling around under the pad on the gel until it is dried out and flung away.
This is where you need the slow 800 or so rpm pad spin.
If you not flinging it around and creating dust your not getting a good cut.
You might want to dawn the goggles until you get a hang of controlling the fling.
Good news, it only stings for a bit.

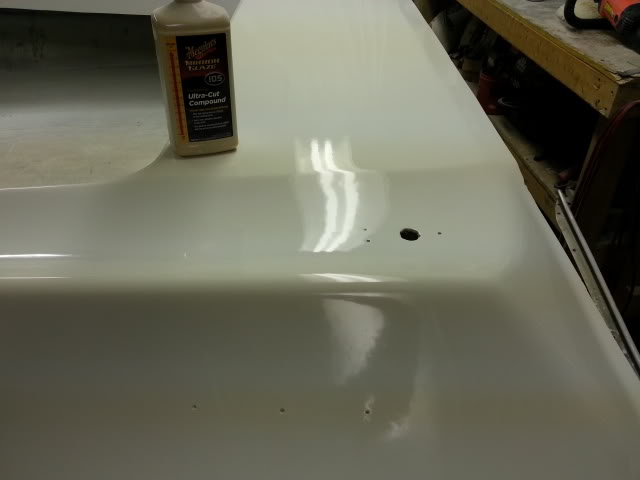
For heavy oxidized boats, marks and brown spots it best to give a good cleaning with Universal Stone.
Awesome Stuff http://www.universalstone.ca/
It will save much time on the first cut as removing all the crud can really clog up the paste and your pad, just like sandpaper clog up.


Arsenal of Tools
Buffer - You need a buffer that has some torque and is variable speed. You need to run no more then 800-900 rpm.
As you will see I use a Makita 7”. http://www.makita.ca/index2.php?event=tool&id=954
Pads - Meguiar’s 8” Pads, W9000 Beige, W8000 - Yellow, W7000 - Burgundy
I get these form Napa http://www.autodetailingsolutions.ne...fing-pads.html
Pastes - 3M Imperial http://www.compositescanada.com/prod...shing-material
AquaBuff 1000 http://www.compositescanada.com/prod...qua-buff-1000w
AquaBuff 2000 http://www.compositescanada.com/prod...aqua-buff-2000
Spray water bottle and some cloth rags.

With this arsenal you have 3 grades of abrasion with the paste and 3 with the pads.
By mix and matching, you use a combination that will give you your required results depending what you are up against.
You want to cut as deep as necessary and then bring back to a shine.

Once restored or from new, an annually cut with 3M Imperial and W9000 Pad is all you need.
Polish with Nu-Finish, haven’t found anything any better or easier to use.

I copied this from a post on another forum, couldn't paste the link because you'd need to log in. This guy has been restoring boats for a very long time, all his work I've seen has been top shelf.

[ Post made via iPhone ] Image
1988 Canadian Edition Vision Sold
1990 Hydrostream Virage Stage 3 Turbo
User avatar

Topic Author
nosboss
Getting my feet wet
Getting my feet wet
Posts: 92
Joined: Jul 15, 2012 3:53 pm
Location: Des Moines, IA
Been thanked: 1 time
Contact:

Re: restoring a Ventura II

Post: # 18758Post nosboss »

Thanks for the tips! I did try my white 3m foam pad after this photo and noticed it worked a lot better even though its very wore out.

[ Post made via Android ] Image
'76 ventura II
'87 200 evinrude xp

'79 baja 180ss
User avatar

Topic Author
nosboss
Getting my feet wet
Getting my feet wet
Posts: 92
Joined: Jul 15, 2012 3:53 pm
Location: Des Moines, IA
Been thanked: 1 time
Contact:

Re: restoring a Ventura II

Post: # 18769Post nosboss »

Finally getting somewhere...

Image

[ Post made via Android ] Image
'76 ventura II
'87 200 evinrude xp

'79 baja 180ss
User avatar

gneises
The new guy
The new guy
Posts: 2
Joined: Jul 24, 2012 12:35 pm
Location: Elk River MN
Contact:

Re: restoring a Ventura II

Post: # 18776Post gneises »

Just finished my ventura 2. Recored the WHOLE boat, transome and everything. And gelcoated the top and bottom. 3 years payed off cuz it is wild

[ Post made via iPod ] Image
User avatar

Topic Author
nosboss
Getting my feet wet
Getting my feet wet
Posts: 92
Joined: Jul 15, 2012 3:53 pm
Location: Des Moines, IA
Been thanked: 1 time
Contact:

Re: restoring a Ventura II

Post: # 18777Post nosboss »

Glad to hear that! I've been on this one 6 months or better. I can't wait for the first ride so i can feel that payoff. What motor and speeds are you getting out of it?

[ Post made via Android ] Image
'76 ventura II
'87 200 evinrude xp

'79 baja 180ss
User avatar

Topic Author
nosboss
Getting my feet wet
Getting my feet wet
Posts: 92
Joined: Jul 15, 2012 3:53 pm
Location: Des Moines, IA
Been thanked: 1 time
Contact:

Re: restoring a Ventura II

Post: # 18780Post nosboss »

Got the whole boat buffed through the first compound. Wiped it down with some glass cleaner to removed any leftover compound so i can move on to the next one. Here is a couple pics...

Image

Image

Image

[ Post made via Android ] Image
'76 ventura II
'87 200 evinrude xp

'79 baja 180ss
User avatar

VultureNo2
Hydrostream know it all
Posts: 997
Joined: Nov 20, 2009 11:35 pm
Location: Pleasant Prairie, WI
Been thanked: 2 times
Contact:

Re: restoring a Ventura II

Post: # 18793Post VultureNo2 »

nosboss wrote: Image
Your finish looks amazing !!!

Is the green stuff just bondo or something else?

Bill
Post Reply

  • Random Topics
    Replies
    Views
    Last post

Who is online

Users browsing this forum: No registered users and 16 guests