Wondering how to post images or maybe change your avatar or maybe something else?
You can find that and a lot of other useful tips for using the forums in the HydrostreamForums Knowledge Base.
To visit the HydrostreamForums Knowledge Base CLICK HERE
You can find that and a lot of other useful tips for using the forums in the HydrostreamForums Knowledge Base.
To visit the HydrostreamForums Knowledge Base CLICK HERE
Getting Ready to Replace the Transom
-
 VultureNo2
- Hydrostream know it all

- Posts: 997
- Joined: Nov 20, 2009 11:35 pm
- Location: Pleasant Prairie, WI
- Been thanked: 2 times
- Contact:
Getting Ready to Replace the Transom
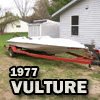
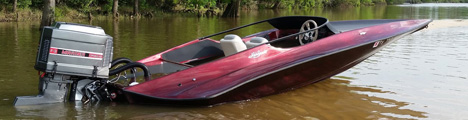
I am finally ready to replace the transom  after getting two good summers out of the Vulture since the re-core. I am struggling to find one of the many great threads that show it step by step with some pictures. Could someone TTT a good thread or post a link to it. Thanks, Bill
-
 Hippie459MN
- Site Admin

- Posts: 3970
- Joined: Mar 25, 2009 7:31 pm
- Location: Nowthen, MN
- Has thanked: 349 times
- Been thanked: 81 times
- Contact:
Re: Getting Ready to Replace the Transom
Do you plan to cut out the splashwell and do you plan to replace it or deck it over? I wouldnt recommended doing it from the outside at all. I have seen it done but its not the most ideal way. Removing the splashwell (Or part of it) is about the best and safest way in the end.
There are a few pictures in my rebuild topic if I remember right. Its wasnt all that bad to be honest. Much easier then the core. lol You could have it done in a weekend easy.
There are a few pictures in my rebuild topic if I remember right. Its wasnt all that bad to be honest. Much easier then the core. lol You could have it done in a weekend easy.
-Kevin
Project Vulture | Project Vector | Project Vamp | Project Vixen
The Vulture Wish List | Project CobraJet
1977 HydroStream Vulture - Worlds longest ongoing project.
1982 Hydrostream Vector
1982 Hydrostream Vamp
1973 Hydrostream Vixen
1976 CobraJet Jet Boat - Outboard conversion project
1976 Pontoon - aka The Family Truckster
-
Hippie459MN
- Site Admin
- Posts: 3970
- Joined: Mar 25, 2009 7:31 pm
- Location: Nowthen, MN
- Has thanked: 349 times
- Been thanked: 81 times
- Contact:
Re: Getting Ready to Replace the Transom
Starts on page 5 - http://www.hydrostreamforums.com/viewtopic.php?f=13&t=1171&start=40
-Kevin
Project Vulture | Project Vector | Project Vamp | Project Vixen
The Vulture Wish List | Project CobraJet
1977 HydroStream Vulture - Worlds longest ongoing project.
1982 Hydrostream Vector
1982 Hydrostream Vamp
1973 Hydrostream Vixen
1976 CobraJet Jet Boat - Outboard conversion project
1976 Pontoon - aka The Family Truckster
Project Vulture | Project Vector | Project Vamp | Project Vixen
The Vulture Wish List | Project CobraJet
1977 HydroStream Vulture - Worlds longest ongoing project.
1982 Hydrostream Vector
1982 Hydrostream Vamp
1973 Hydrostream Vixen
1976 CobraJet Jet Boat - Outboard conversion project
1976 Pontoon - aka The Family Truckster
-
VultureNo2
- Hydrostream know it all
- Posts: 997
- Joined: Nov 20, 2009 11:35 pm
- Location: Pleasant Prairie, WI
- Been thanked: 2 times
- Contact:
Re: Getting Ready to Replace the Transom
Thanks for the link Hippie, I will be cutting out the splash well as carefully as possible. If I get it out clean I will try to save it. If I can't, I am ok with glassing it over. I will be tying it into the stringers and am considering beefing up the support across the back which probably will mean decking it over, but I haven't decided yet. I want it to be ready for newer or bigger power in the future. I will post it as I go? Bill
-
Hippie459MN
- Site Admin
- Posts: 3970
- Joined: Mar 25, 2009 7:31 pm
- Location: Nowthen, MN
- Has thanked: 349 times
- Been thanked: 81 times
- Contact:
Re: Getting Ready to Replace the Transom
Cody also has some pretty good pictures in his Vector topic too if I remember right.
And of course post your progress. You know how we all like progress pictures.
And of course post your progress. You know how we all like progress pictures.
-Kevin
Project Vulture | Project Vector | Project Vamp | Project Vixen
The Vulture Wish List | Project CobraJet
1977 HydroStream Vulture - Worlds longest ongoing project.
1982 Hydrostream Vector
1982 Hydrostream Vamp
1973 Hydrostream Vixen
1976 CobraJet Jet Boat - Outboard conversion project
1976 Pontoon - aka The Family Truckster
Project Vulture | Project Vector | Project Vamp | Project Vixen
The Vulture Wish List | Project CobraJet
1977 HydroStream Vulture - Worlds longest ongoing project.
1982 Hydrostream Vector
1982 Hydrostream Vamp
1973 Hydrostream Vixen
1976 CobraJet Jet Boat - Outboard conversion project
1976 Pontoon - aka The Family Truckster
-
 YDOC462
- HSF Lifetime Supporter

- Posts: 901
- Joined: Apr 11, 2010 12:57 pm
- Location: beaumont, tx
- Has thanked: 23 times
- Been thanked: 5 times
- Contact:
Re: Getting Ready to Replace the Transom
my thread is a bit wordy bill but maybe this will help
heres where the trans goes in:
http://www.hydrostreamforums.com/viewtopic.php?f=13&t=909&start=60
knees:
http://www.hydrostreamforums.com/viewtopic.php?f=13&t=909&start=90
splashwell going back together:
http://www.hydrostreamforums.com/viewtopic.php?f=13&t=909&start=160
one thing that i learned from mine is not to cut the high ridge (top of gunwale) when removing the splashwell. theres a support board that runs inside. the guy before me cut mine and i had to splice in some support boards when building the splashwell.
keep us posted
81 vector....complete restore....1991 7 pedal 200 slightly modded
ALWAYS under construction
HYDROSTREAM HELLIONS
https://www.youtube.com/watch?v=YHE8wWZsFpw
ALWAYS under construction
HYDROSTREAM HELLIONS
https://www.youtube.com/watch?v=YHE8wWZsFpw
-
VultureNo2
- Hydrostream know it all
- Posts: 997
- Joined: Nov 20, 2009 11:35 pm
- Location: Pleasant Prairie, WI
- Been thanked: 2 times
- Contact:
Re: Getting Ready to Replace the Transom
Thanks for the responses. I got the tank out the other night and am getting ready to take the jackplate off. the motor has already been removed and is at a shop getting a go over. It's in good hands and should come home with the needed and lacking power out of the hole and a clean idle. By spring I should be all set, except for a paint job someday maybe. Bill

Re: Getting Ready to Replace the Transom
I ONLY WANT TO MENTION THIS BECAUSE IT IS SO MUCH EASIER, BUT I KNOW MANY WILL STRONGLY DISAGREE; HAVING PREFACED WITH THIS STATEMENT, HERE ARE MY 2 CENTS, AND THE 2 CENTS OF MANY NAVAL ENGINEERS ON TRANSOM REPLACEMENT, THAT IS EASIER.
A HYDROSTREAM IS, PERHAPS, THE PERFECT BOAT FOR AN OUTSIDE TRANSOM REPLACEMENT, BECAUSE, THE TRANSOM IS SO SMALL (BOTH NARROW, AND SHORT, DUE TO THE NOTCH UNDERNEATH). BY COMPLETING THE REPAIR FROM THE OUTSIDE OF THE BOAT, ONE NEED NOT BE A FIRST CLASS "BODY MAN" AND ONE NEED NOT SPEND SEVERAL HOURS BLENDING THE SPLASHWELL AREA, AND COLOR MATCHING (COLOR MATCHING IS THE BIGGEST PAIN IN MY BOOK). A TRANSOM CAN BE CUT FROM THE OUTSIDE AS LONG AS ONE LEAVES A NICE 2 INCH EDGE ON THE OUTER SKIN. CUT THE SKIN, PEEL IT OFF, AS CAREFULLY AS POSSIBLE, CHISSLE OUT THE WOOD AND ONCE IT IS CLEANED UP VERY NICE, AND SCUFFED VERY WELL WITH 36 GRIT, CUT PIECES OF 1/2 INCH FOAM TO FIT THE DIMENSIONS INSIDE OF THE TRANSOM. YOU WILL PLACE THREE LAYERS THICK, BUT YOU WANT THE CUTS ORIENTED SO THAT THE CUTS ARE MADE IN DIFFERENT LOCATIONS ON EACH LAYER. ONCE THIS IS DONE, YOU WILL BE CUTTING EXTERIOR PLY (OR FOR THOSE THAT LIKE TO OVERKILL ON A BOAT THAT DOES NOT STAY IN THE WATER, USE A LLOYDS BS1088 VENEER) AND USING THE FOAM AS A TEMPLATE FOR YOUR WOOD PIECES. MARK THE WOOD WITH WHATEVER CAUSES YOU TO REMEMBER WHERE EACH PIECE GOES. I MARK WITH "INNER," "MIDDLE," AND "OUTER," AND THEN USE NUMBERS TO MARK FOR EACH LOCATION, AS NEEDED. UPON THE WOOD BEING CUT OUT, YOU DON'T HAVE TO, BUT YOU WILL BE BETTER OFF (AGAIN FOR THOSE THAT LIKE OVERKILL) BY CREATING A BEVEL ON EACH PIECE OF WOOD, AT EACH EDGE, FROM BOTH SIDES. THIS MEANS, IF THE WOOD IS 1/2 INCH THICK, YOU CAN BEVEL 2-3 INCHES ON EACH SIDE, AT EACH EDGE. YOU DO NOT NEED TO BEVEL TO A MARINE BEVEL OR AURONAUTICAL BEVEL, I WILL EXPLAIN WHY IN A MINUTE. ONCE THIS IS ALL CUT OUT, YOU WANT TO MAKE SURE EVERYTHING FITS IN EASILY WITHOUT A PROBLEM. ONCE THIS IS SO, WIPED EVERYTHING ONE LAST TIME WITH ACETONE, AND BUTTER UP THE INNER SKIN WITH "NEAT EPOXY," THEN WHILE IT IS SITTING, AND YOU ARE AWAITING IT TO "TACK UP" A BIT, BRUSH YOUR NEAT EPOXY ONTO THE WOOD PIECES, FRONT AND BACK, ALL OF THE EDGES AND SPEND A GOOD 15 MINUTES DOING THIS, AS THE EPOXY LOSES ITS SHINE, BECAUSE THE WOOD IS ABSORBING IT, BRUSH ON SOME MORE UNTIL THE WOOD WILL DRINK NO MORE. NOW, MIX UP SOME MORE, BRUSH THE INNER SKIN WITH THE EPOXY THAT HAS BEEN THICKENED WITH COLLOIDAL SILICA, TO THE CONSISTENCY OF COLD PEANUT BUTTER. YOU NEED TO JAM THIS STUFF INTO EVERY NOOK AND CRANNY INTO THE CORNERS OF THE TRANSOM AND BUTTER THE ENTIRE INNER SURFACE, AS WELL. THEN BUTTEER YOUR FIRST LAYER OF WOOD, AND PLACE IT IN. PUSH IT IN SNUG, HARD AS YOU CAN BY HAND. SOME EPOXY WILL OOZE OUT, BRUSH MORE ONTO THE FIRST LAYER, AND THEN YOU ARE READY TO BUTTER AND PLACE IN THE SECOND AND FINAL LAYER OF WOOD, ALL USING THE SAME METHOD. IF YOU HAVE MIXED IT A BIT TOO THICK, YOU MAY NEED TO INVENT A QUICK WAY TO APPLY SOME TEMPORARY PRESSURE TO THE FINAL LAYER, IF IT IS SITTING OUT TOO PROUD IN THE CENTER. I THEN ALLOW IT TO CURE AT THIS POINT. GIVE IT AN HONEST COUPLE OF DAYS. YOU WILL BE USING SLOW CURE EPOXY, SO THIS IS EVEN MORE IMPORTANT. ONCE CURED, SCRUB WITH A WET SCOTCH PAD, AS SOME AMINE BLUSH WILL HAVE OCCURRED ON THE SURFACE, GRAB YOUR 36 GRIT AND GRIND TO MAKE A NICE 1/8 INCH OR SO OF SPACE OF DEPTH, TO BED YOUR OUTER SKIN. GRIND THE BACKSIDE OF THE SKIN, UNTIL IT IS PLENTY THIN ENOUGH TO FIT INTO ITS PROPER PLACE. NOW WET THE SKIN AND THE TRANSOM WITH NEAT EPOXY, LET IT TACK, ADD SOME SILICA TO MAKE IT LIKE KETCHUP, AND BUTTER BOTH SURFACES, PUSH THE SKIN INTO PLACE. NOW, YOUR FINISH WORK IS EASY. YOU WILL BE ABLE TO BLEND THE EDGES BY BEVELING, FILLING, AND PUTTING ONE FINAL LAYER OF 1708, THEN FILLING AND PAINTING, JUST TO THE 4 EDGES OF THE TRANSOM!!!!!!! YOU NEVER TOUCH THE SPLASHWELL, YOU DON'T EVEN NEED TO GET THE COLOR TO MATCH 100%, SINCE, YOU WILL HAVE A BREAK IN THE LIGHT AT THE EDGES ANYWAY. THIS IS THE ONLY METHOD I HAVE USED FOR YEARS, AFTER DOING IT IN MY VIEW, THE HARD WAY FOR MANY YEARS. IT HAS BEEN SHOWN TO ME BY BOAT BUILDERS, AND ENGINEERS AS TO HOW THIS IS MORE THAN SUFFICIENT. LET ME MAKE A COUPLE QUICK POINTS BELOW;
1)USE EPOXY WHEN DOING THIS. IT BONDS SECONDARILY FAR BETTER THAN POLY OR VINYL.
2)USE SLOW CURE EPOXY, AS THIS REALLY HELPS YOU NOT BE IN A RUSH.
3)WHEN PEOPLE SAY IT IS NOT STRONG, REMEMBER, ONLY THE SKINS ARE REALLY TAKING THE STRAIN. THE WOOD IS THERE TO SIMPLY HOLD THE SKINS EQUALLY APART, SO IT IS A MOOT POINT. IF JELLO COULD KEEP THE SKINS AND EQUAL DISTANCE APART, JELLO WOULD WELL FOR THIS ALSO. THIS IS PRECISELY WHY WE ADD THE SINGLE LAYER OF 1708 TO THE OUTSIDE OF THE SKIN.
4)IF STILL UNSURE, ADD KNEE BRACES TO THE INSIDE.
5)WHEN CHISSELLING OUT THE WOOD, REMEMBER, YOU CAN ALSO CUT OUT THE INNER SKIN UNDER THE SPLASHWELL WHERE NOBODY SEES, IF SOME OF THE WOOD IS STUBBORN.
6)FOR ME, USING THIS METHOD, IT SAVES ME AN HONEST DAYS WORK, AS I DON'T HAVE TO PAINT THE ENTIRE DECK, JUST THE TRANSOM. THINK ABOUT IT.
I KNOW THIS MAY MAKE MORE SENSE WITH PICTURES, SO CALL ME IF YOU HAVE ANY QUESTIONS, BUT, HONESTLY, FOR THE AVERAGE GUY HERE, THAT DOESN'T WANT TO PAINT THE ENTIRE DECK, OR BLEND IN A SPLASH WELL, AND SAVE A LOT OF TIME, THIS METHOD IS PERFECT. IT IS EVEN THE METHOD THE ENGINEERS TEACH FROM GEUGEON BROTHERS (MAKERS OF PROSET AND WEST SYSTEM). THESE GUYS ARE ALL ENGINEERS, AND THEY STAND BY THIS. I HAVE NEVER SEEN A TRANSOM SO MUCH AS DEVELOP A NEW STRESS CRACK FROM THIS.
RONNY JETMORE
410 394 9000
-
VultureNo2
- Hydrostream know it all
- Posts: 997
- Joined: Nov 20, 2009 11:35 pm
- Location: Pleasant Prairie, WI
- Been thanked: 2 times
- Contact:
Re: Getting Ready to Replace the Transom
Ronny, I wish I would have paid more attention and read your post before I cut the well out. I woiuld have liked to save the original look. Thanks for the long explaination. Too late now. Bill
Last edited by VultureNo2 on Mar 19, 2013 11:33 am, edited 1 time in total.
-
idvette
- Hydrostream know it all
- Posts: 527
- Joined: Aug 08, 2011 10:22 pm
- Location: Peterborough Ontario
- Has thanked: 11 times
- Been thanked: 34 times
- Contact:
Re: Getting Ready to Replace the Transom
I will want to look up this process when it's my turn as well. My tri colour metalflake gel will be impossible to match, I would have to paint the whole boat, and I don't want to. I like it the way it is, would muck rather it stay original. I would be interested to see how the stringers are fitted with the splash well in place, but won't stress over it until it's time. Good luck with yours Bill!!
[ Post made via iPhone ]
[ Post made via iPhone ]
1988 Canadian Edition Vision Sold
1990 Hydrostream Virage Stage 3 Turbo
1990 Hydrostream Virage Stage 3 Turbo
-
- Random Topics
- Replies
- Views
- Last post
-
- 5Replies
- 8722 Views
- Last post by RussF
Mar 19, 2013 7:39 pm
-
- 1Replies
- 3447 Views
- Last post by Hippie459MN
Mar 15, 2013 2:58 pm
-
- 1Replies
- 6656 Views
- Last post by Surface Scratcher
Mar 16, 2013 12:12 pm
-
- 6Replies
- 5699 Views
- Last post by Hippie459MN
Mar 17, 2013 7:30 pm
-
- 33Replies
- 15137 Views
- Last post by koukrapock
Mar 25, 2013 8:40 pm
Who is online
Users browsing this forum: Bing [Bot] and 73 guests