Page 6 of 8
Re: 83 V-King (Bruiser) Restoration
Posted: Mar 24, 2018 7:45 pm
by RussF

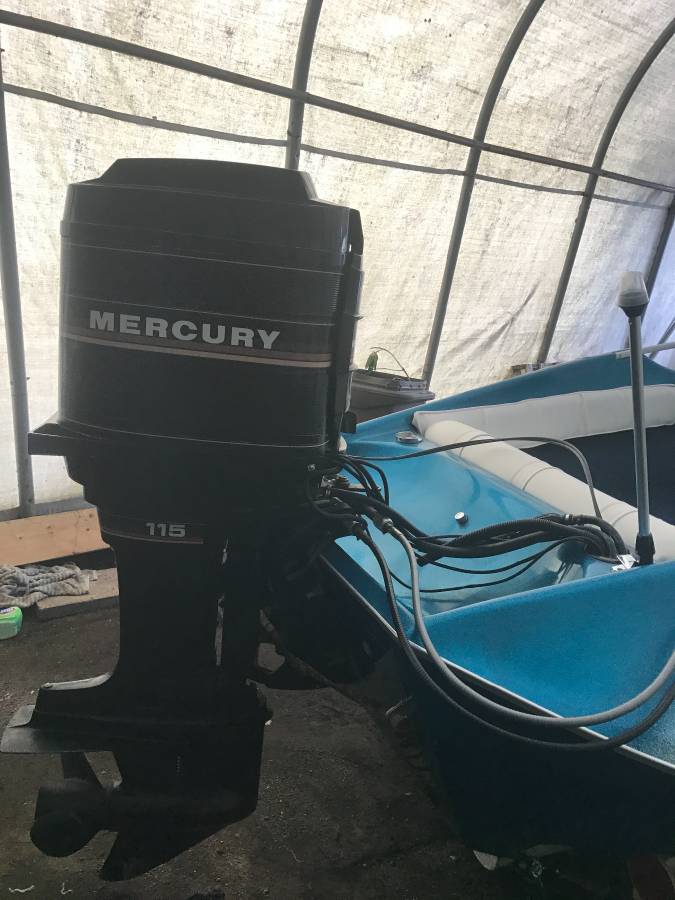
- 00C0C_h1d80QL3dL1_1200x900.jpg (66.91 KiB) Viewed 2842 times
Re: 83 V-King (Bruiser) Restoration
Posted: Mar 24, 2018 7:46 pm
by RussF
- 00r0r_7G3KOIV742G_1200x900.jpg (72.48 KiB) Viewed 2842 times
Re: 83 V-King (Bruiser) Restoration
Posted: Mar 24, 2018 9:32 pm
by 83VKING
wow! that's the color scheme i wanted. such a great combination thanks or sharing. are you going to be running it this year? any plans to do the core/floor transom?
Re: 83 V-King (Bruiser) Restoration
Posted: Mar 25, 2018 4:16 am
by RussF
the core and transom was done about 8 years ago and put in a barn then the guy sold it to the guy I got it from ........he owned for 2 years
Re: 83 V-King (Bruiser) Restoration
Posted: Mar 25, 2018 11:05 am
by 83VKING
wow great barn find. mine was sitting outside for 8 years with no cover. rain, snow, sun.. you get the picture total rebuild.
anyway thanks for sharing!
continuing on, i was able to glass the bottom of the floor and lay it down. i used the Loctite PL glue around the edges and on top of the stringers as a bond. i used screws in the center and placed cinder blocks on the floor to relay hold it down.
because i removed the foam boxes on the sides i replaced it with a wood stringer for additional strength and to i can hold miscellaneous boating gear. as we all know there is limited amout of room in theses boats, having the sides open like this will alow me to store much more stuff. looking back verry glad i did because i uses this area all the time.


I covered the floor with 1708.


Re: 83 V-King (Bruiser) Restoration
Posted: Mar 26, 2018 9:04 pm
by 83VKING
Finally the floor is glassed in!! its been months walking around the hull and trying to be careful. now i can jump in the boat! the next project is the front seat boxes. because of the seats i chose, i was trying for along time to figure out how i will mount them. since there is very little room anyway there is no need for a pedestal or swivel. my best bet was just to through bolt the seat down in one position all the time. so i decided to create seat boxes and have the seat just sit right on it.
Three sides and a top. The front it open so i can put a map or something in there. just another storage place. i needed it open to through bolt the seat any way. they were glassed in all around. i did not put a screw through the floor.
It was time to measure the gas tank. well i thought i measured correctly.. wrong. the tank does not fit under the splash well. this happens more than you think, come to a complete stop and time to rethink everything. i did not want to use external tanks. so after going back to the drawing board i searched this form for hours. i decided to push the back seat forward 10" and make a back hatch that swings open. i believe hydrostream made this in the later models. not to common.
for the back seat... well i searched and searched. and the most practical seat i could find was an all white pontoon seat. when i got it i needed to do some major overhauling. because the base was square and it stuck up a good foot above the side of the boat. (looked wicked bad). took the plastic base and made an aggressive angle and cut it so the seat will lean back and be almost touching the floor.i had to make sure i measured this correctly because i only had one chance at this. After i cut it i noticed that the base was not stable at all. i cut 1/2" pieces of wood, glassed them, then screw them in and braced the bottom. As you will see in the pictures. i also decided to put hinges at the bottom so i can fold the back seat forward so i can work back near the tank / battery / trim pump.
Re: 83 V-King (Bruiser) Restoration
Posted: Mar 26, 2018 9:27 pm
by 83VKING
Re: 83 V-King (Bruiser) Restoration
Posted: Mar 27, 2018 5:45 pm
by RussF
Re: 83 V-King (Bruiser) Restoration
Posted: Mar 31, 2018 10:37 am
by 83VKING
Once the seats have been fitted and measured i took everything back out and prepped the floor for black gel coat. i chose to do this because it just adds an extra layer of protection. the floor all they way back to the transom was covered in gel coat. the area were i have been doing all of fiberglass and wood work was now a mess and everything i touched i had fiberglass on it. so i decided to bring it out in the sun, and work out side because it was now May 2017.
Mounting the engine was my next big project. Luckily i used the same holes as Hydrostream. i purchased a stainless steel plate for the motor to sit on. The mirror finish is more for looks, why not right. The hardest part was drilling stainless!! Too many bits were destroyed. But it mounted and fit like a champ.
The boat looked like it had really bad oxidization on it, but what had me thinking it was possible to buff it out was when the boat was wet it looked brand new. so my next project was to buff the entire boat. once the boat was buffed it was time to start the dash panel, mount the trim unit, put bass tank in, etc...
Re: 83 V-King (Bruiser) Restoration
Posted: Mar 31, 2018 5:27 pm
by RussF
I have to get over there and see this one day


